Home Improvement

Boosting Your Creativity for Home Decorating Projects

Most people would like to think of themselves as creative. After all, who wouldn’t want to be able to think outside the box and come up with new and innovative ideas? 

The truth is, however, that not everyone is born with a natural talent for creativity. But that doesn’t mean you can’t learn how to be more creative. In fact, there are a few simple things you can do to boost your creativity and help you come up with new ideas for your home.

What is creativity, and why is it important? 

Creativity is the ability to come up with new ideas. It can be used in a variety of different ways, from creating new products and services to coming up with solutions to problems.

Creativity is important because it helps us to innovate and come up with new ways of doing things. It also allows us to see things in a different light, which can lead to breakthroughs and improvements in all areas of life.

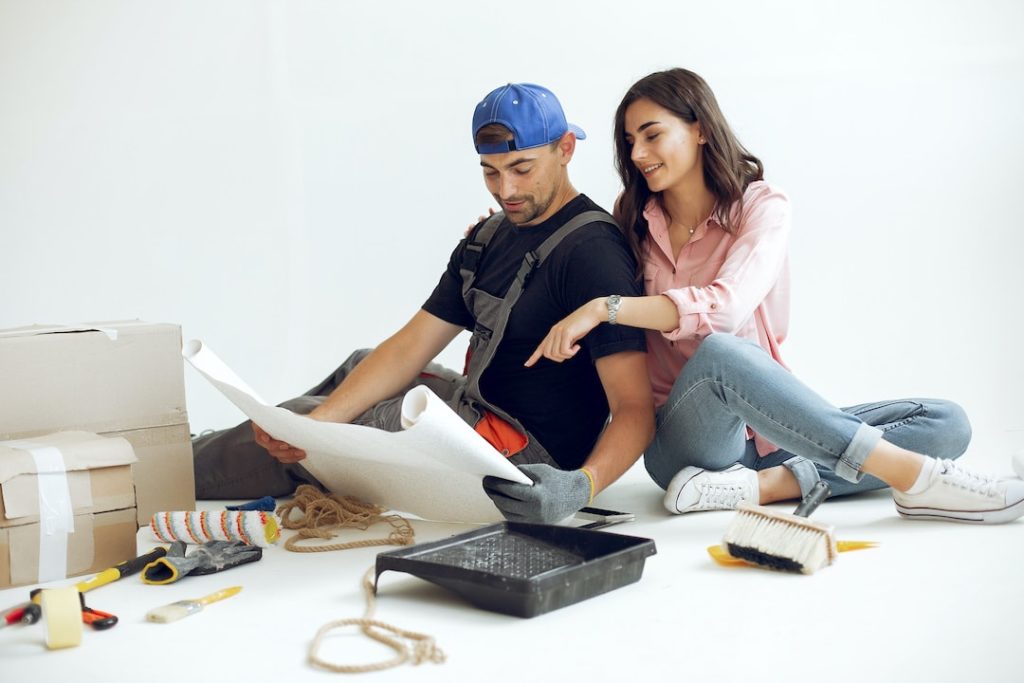
How can you be more creative in your home decorating projects? 

When it comes to redecorating your home, it is important to tap into your creative side. After all, your home should be a reflection of your unique personality. 

There are endless possibilities when it comes to expressing yourself through your decor. 

However, if you’re feeling stuck, here are a few tips to help get your creative juices flowing. 

  • First, take some time to browse through home décor magazines and create an inspiration board. This will help you narrow down your style preferences and allow you to visualize your ideal space. 
  • Next, don’t be afraid to experiment with different colors, textures, and patterns. Even small changes can make a big impact on the overall look and feel of your home. 
  • Finally, remember that there is no right or wrong way to decorate your home. The most important thing is to have fun and let your creativity flow!

So, as you can see, being creative is not only fun, but it can also be very rewarding. By tapping into your creative side and experimenting with different ideas, you can create a home that is truly unique and reflective of your personality.

Tips for boosting your creativity and coming up with new ideas.

Brainstorming is a great way to generate new ideas. 

Start by writing down everything that comes to mind, no matter how far-fetched it may seem. 

Once you have a long list, you can start to narrow it down and see which ideas have the most potential. It can also be helpful to talk to other people and get their perspectives on your ideas. 

Another way to boost your creativity is to take some time for yourself and allow your mind to wander. Take a walk in nature, or simply sit quietly and let your thoughts flow. You may be surprised at the new ideas that come to you when you give yourself some time and space to relax. 

By trying out different brainstorming techniques, you can increase your chances of coming up with innovative

Examples of creative home decorating projects.

When it comes to home decorating, there are endless possibilities. But with so many choices, it can be hard to know where to start. If you’re looking for some inspiring ideas, here are a few examples of creative home decorating projects:

One easy way to add interest to any room is with a fresh coat of paint. You can create a whole new look by simply changing the color of your walls. If you want something more daring, try painting stripes or even patterns on your walls. 

Another way to add personality to your home is with unique window treatments. Instead of opting for boring store-bought curtains, try making your own from fabric scraps or vintage textiles. 

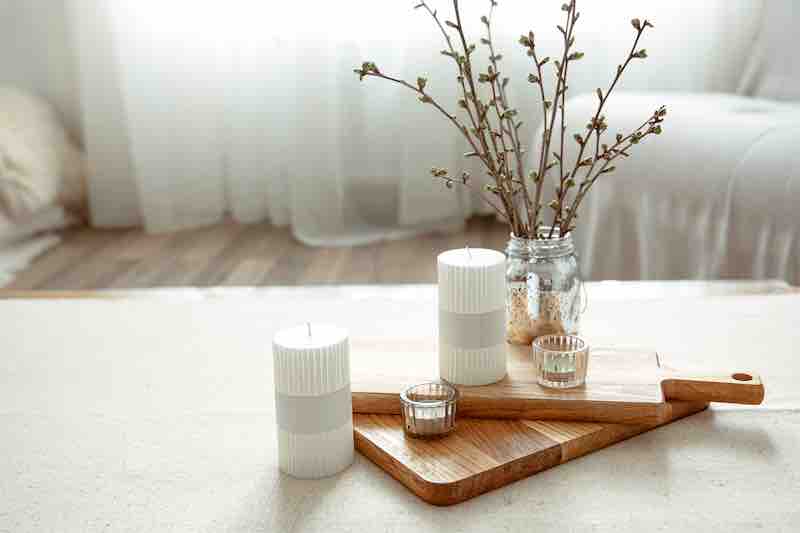
And don’t forget about the power of accessories! By adding a few well-chosen pieces, you can completely transform the look and feel of any room. So get creative and have fun with your home decorating projects!

The bottom line is that there are no rules when it comes to decorating your home. The most important thing is to express yourself in a way that feels authentic and true to you. So don’t be afraid to experiment and take risks. The results may surprise you!

Final Thoughts

Creativity is something that can be cultivated and enhanced through practice. 

By trying out different brainstorming techniques, you can increase your chances of coming up with innovative ideas for your home decorating projects. 

And don’t forget to have fun with it! 

The best results often come when you allow yourself to be playful and experiment with different ideas. So get creative and see what amazing transformations you can achieve in your home.

Continue Reading
Home Improvement

Debunking Home Improvement Myths: How Anyone Can Do It

When it comes to home improvement, there are a lot of myths and misconceptions floating around. People seem to think that if they’re not experts, they can’t do any kind of renovation or repair work on their own homes.

But that’s simply not true! In reality, anyone can do some basic home improvement tasks with a little bit of instruction and some practice.

In this post, we’ll debunk some of the most common home improvement myths and show you how you can get started on your own projects today. We’ll also provide some tips for avoiding common mistakes made by beginners.

So read on to learn everything you need to know about home improvement.

Myth #1: The tools you need are expensive and complicated

When we think of home improvement, we tend to think of power drills, table saws, and other large and expensive pieces of equipment. But the truth is, you don’t need any special tools at all.

For most tasks, a few simple hand tools will do the trick. A ruler, a saw, some clamps, perhaps a drill are really all you need to get started. And once you have those tools on hand, you can tackle just about any home improvement task.

Myth #2: It’s dangerous

Another misconception is that home improvement is inherently dangerous.

Yes, being around power tools and building materials for extended periods of time does carry some risk, but with proper instruction and safety equipment, it’s perfectly safe.

In reality, many common tasks are actually quite safe as long as they’re done properly.

Simply follow the instructions in your home repair guide carefully and use the right protective gear (safety goggles especially), and you’ll never have anything to worry about.

Myth #3: You can’t do it

Perhaps the biggest home improvement myth of all is that you just can’t do it. If you don’t have any experience or skills, then you need to hire a professional instead. It’s too hard and complicated to try on your own.

But this simply isn’t true—there are countless DIY tutorials out there for almost every type of home repair work. With some patience and an instruction manual, you’ll be able to install light switches, tile a backsplash, or build new furniture in no time at all.

Myth #4: You need a ton of space

Sometimes when you buy a house, it seems like there’s not enough space for your stuff. That can be frustrating when you’re trying to put furniture in a room or store items in the closets and cabinets.

But often this is just because we’ve let our belongings get out of control. When you start decluttering and throwing away old things, the problem practically solves itself. With some good organization techniques, even small houses can hold all your possessions with ease.

Myth #5: Renovations are expensive

One of the most common dilemmas homeowners face is whether to redecorate their homes or invest their money elsewhere.

After all, home improvement projects aren’t cheap. You’ll need to shell out more than just a few bucks for new floors, painting supplies, and furniture.

However, remember that there are other ways to improve your home besides renovations. If you keep your eyes open and watch for bargains, you may be able to find all the things you need for free or at a low cost.

By focusing on decluttering and organizing first and avoiding unnecessary spending on renovation projects, you can make your house feel better without breaking the bank.

Myth #6: It’s too late

Many people think that it’s already too late to start doing their own home improvement work. That they missed their chance to become handy with tools and building materials because they never developed those skills.

However, it doesn’t matter how long you’ve neglected your DIY skills. It’s never too late to get back into home improvement work—in fact, some people only discover their love of DIY when they retire from their regular jobs.

As you can see, there are plenty of common misconceptions about home repair and renovation projects.

Don’t be fooled by these old wives’ tales.

If anything, being a do-it-yourselfer makes the process simpler and more enjoyable.

Myth #7: It’s all about the tools

Sure, owning power tools can make home repair work go much faster. But it’s not just about having the latest gadgets on hand. It’s also about skills and knowledge.

If you have an idea of what to do but don’t own any construction equipment, then try borrowing or renting some power tools instead of buying them.

Sometimes it makes more sense to pay a one-time fee than to invest in expensive equipment that you only use occasionally.

Myth #8: It takes forever

It might seem like home repair projects take ages because they require so many steps along the way.

You have to buy supplies, gather your tools, read up on how to do something properly, and give yourself plenty of time to work.

But the truth is that you can complete all of these tasks much more quickly than they appear. If you plan out your home repair work ahead of time, then it won’t seem so intimidating.

So don’t let yourself get discouraged—get started on your home improvement projects now!

Myth #9: It’s complicated

Finally, some people think that home repair and renovation work is far too difficult for them to accomplish on their own.

While it’s true that some jobs can be quite complex, others are actually very simple. For example, you don’t need a degree in engineering to hang up a shelf or replace a light bulb.

These sorts of tasks require no more than patience and the right tools.

In fact, many DIY projects only appear complex because they’re explained in technical terms online or in books.

If you simplify them a little bit for yourself by putting things in layman’s terms, then you’ll be able to complete even the most challenging of tasks with ease.

Myth #10: It’s boring

But the truth is that it doesn’t have to be so dull. In fact, many people actually enjoy painting a room bright blue or adding a splash of color with new throw pillows.

You can also use your free time to read up on how you can improve your home in other ways, such as turning your basement into a family room or installing an in-ground sprinkler system for your backyard.

Whether it’s building shelves, laying down tile, or refinishing furniture, there are plenty of fun ways that you can spend your time when you’re doing home repair work.

Wrapping up

It’s never too late to start your own home improvement projects, and you don’t need a degree in engineering for some tasks.

This myths-busting article has provided 10 of the most common misconceptions about DIY work that everyone should know before they get started with their next project.

Which of these myth-busting principles has helped you change your perception of home repair? Let us know in the comment section below!…

Continue Reading
Home Improvement

10 Ways to Tackle a Successful DIY Project

There are some home improvement projects that seem to be easy, but as soon as you start doing them, they turn out to be a lot tougher than expected.

Making these mistakes can lead to bigger and more expensive problems down the line. That’s why it’s important to be prepared before you start any project and to have the right tools and materials on hand.

Here are a few more tips for completing DIY projects successfully:

1) Make sure you read the instructions carefully before starting

Reading the instructions carefully before starting a project is one of those things that seems obvious, but it’s actually very important.

It’s easy to think you know what you’re doing and start without really thinking about what might happen if something goes wrong. But for any project, there are going to be some details that need careful consideration so it can be done properly and safely.

That means reading the instructions over first will help prevent problems down the line. And because you’ll have all your materials on hand too, this should make projects go more smoothly from start to finish.

2) Take your time and measure twice, cut once

Taking your time when you’re doing a project is really important because rushing will only lead to problems.

It’s good to have some music on in the background as you work, so listening to a CD should help take the edge off and allow you to think about what needs to be done next.

Another thing that can be helpful is using a tape measure for all measurements, even if it’s just an estimate. This way if something goes wrong later, you’ll know whether it was due to human error or not. Remember, working smarter will prevent mistakes from occurring. That way there should be no dilemma as to who caused any issues with a specific job that might happen down the line.

3) Don’t be afraid to ask for help if you need it

It’s never fun to think you can’t do something, especially if it’s a project that needs to be done. But if you’re stuck on how to do something or need some help after running into problems, don’t be afraid to ask for the assistance of others who might have experience with what you are trying to accomplish.

Even if they aren’t experienced in doing certain projects, most people will be happy to help because by lending their eyes and ears for just a little bit, they’ll learn something new as well.

That way everyone is able to benefit from DIY projects instead of just one person being frustrated because he or she didn’t know the answer on his/her own.

4) Clean up right away after finishing

Another thing that happens when doing home improvement projects is the mess.

It doesn’t make sense to leave things out or on their way to being assembled until the project is finished because it will only lead to more work later on.

So make sure you clean up right away after finishing a project so you don’t have any extra work down the line.

If you think ahead of time about how everything needs to be put away, then that should go smoothly too.

5) Take breaks throughout the day

It’s normal to get tired while working on a project, especially if it takes a while.

So make sure you’re taking regular breaks while working because this will help prevent accidents from happening. It’ll also help you be more productive too since resting up can actually boost your brainpower and ability to do all kinds of work.

6) Start small if you’re not really confident about DIY projects

Some people might love doing things around the house like fixing broken appliances or installing new hardware. Others find that these types of DIY projects seem intimidating or scary, which can cause people to delay getting started with them. If you feel that way, then consider starting small by just making simple fixes here and there. This will help build your confidence so you might be more inclined to tackle bigger projects too in the future.

7) Keep things clean while working

This is another thing that can lead to problems while doing home improvement work, but it’s something that shouldn’t be overlooked because it will impact how everything turns out in the end.

It’s easy to get dirty when working on a project, especially since many of them involve power tools and other devices. And if you’re using materials like wood or drywall, then debris from those items could get everywhere too.

That means keeping things clean will benefit any project because making a mess will only make jobs harder and longer than they need to be.

8) When in doubt, double-check

When working on a project, it’s easy to get lost in the details. However, this can lead to issues later on because mistakes might slip through the cracks or you could misinterpret something that needs to be done.

That’s why if you have any doubts about how things are supposed to be done or whether there is anything else that needs to happen now, then don’t just assume you’re right and go with that.

Instead, take some time out of your schedule so you can double-check everything just to make sure nothing will cause problems down the line.

This way there also won’t be any disputes with other people involved in trying to complete a certain objective. Every person will know exactly what they are supposed to be doing, which will lead to smooth sailing.

9) Don’t rush during DIY projects

It can become tempting to want everyone to start working on a project right away because that means the sooner it’s completed, then they’ll have more time for other things they’d rather do. However, this isn’t always best since rushing can lead to mistakes or equipment not being used properly. So make sure you’re taking your time while working so success is possible without having any issues later on due to rushing through things.

And if you need help tackling big jobs like trying to fix plumbing problems around the house then consider hiring some professionals instead. They’ll know how everything is supposed to be done and make sure all they are trying to do is completed successfully.

10) Take pictures or save instructions during projects

If you’re trying to remodel the house, then it’s essential that something gets documented while working on objectives. This can be done by taking photographs of things being built or saving instructions for anything you need when they might not even be available in paper form anymore.

Take pictures when they can go along with written documentation too because this will provide extra proof about what was supposed to happen and prevent any disagreements from happening down the line. It can also help people who move into a home after it’s constructed to see what was included and how things were supposed to look in the end if there are ever questions later on.

Last Words

The article has provided a lot of useful information about how to approach DIY projects. For example, you should never rush when doing something on your own because it could lead to mistakes or equipment not being used properly. You also need to make sure that everything is done correctly and documented either through pictures or written instructions so there are no misunderstandings later on down the line.

Finally, if you’re trying to remodel the house then it’s important that someone document their process while working because this way any problems can be solved more easily before they become larger ones in the future.

Let us know what other things we might have missed!…

Continue Reading
Home Improvement

7 Home Improvement Types Every Homeowner Needs To Consider

There are many types of home improvement projects you can complete. This article covers a few of them so you can get started.

The Bathroom

One type of home improvement is the bathroom remodel. Homeowners should complete this project if their bathroom doesn’t look nice, if there are fixtures that need to be replaced, or they want to create more storage space.

The first step in a bathroom remodel is to carefully plan what needs to be done. Tools and materials that will likely be needed for this project should also be purchased before work begins.

The homeowner should decide what new features they want, such as tile flooring, a modern sink, or a shower curtain rod holder. Armed with these decisions, the second step would involve removing the old fixtures and installing any new ones. It’s not uncommon for homeowners to substitute old tubs and sinks with walk-in showers, for example.

If the bathroom is cluttered and disorganized, this is a great time to make some changes.

There are many ways to add storage space in bathrooms.

Cabinets, drawers, and shelves can be added along the walls of the room. The homeowner should remove everything out of these new compartments and decide what stays or goes in order to avoid clutter again in the future.

If they wish to install new tiles on their floor, they should decide now so that all of those materials will be ready when it’s time to do those types of renovations as well.

The final step would involve putting everything back together and cleaning up any messes made during the process. It may only take a few days to complete, but this project should be done carefully and with much thought.

The Kitchen

Another great home improvement project is the renovation of the kitchen.

If there are appliances that need to be replaced or if they no longer work, those should be disposed of as soon as possible. If there are cabinets that have been outgrown or that aren’t nice enough for how much money has been spent on them, those can now be replaced.

New appliances will likely need to be purchased before starting the renovation process, whatever these may end up being—like refrigerators with French doors or microwaves with convection ovens.

As far as cabinet replacements go, homeowners should start by drawing up an inventory of all of the items they want to keep in their kitchen. They should make sure to remove anything that isn’t necessary anymore, including old appliances and utensils.

The homeowner can then decide what new cabinets they wish to purchase, measure them thoroughly, and draw up a plan for installation before ordering the replacement units.

If there are any holes or dents on the walls of the kitchen, those should be filled with plaster before any new cabinets are installed. It is essential that everything looks nice when all is said and done since this will likely be one of the most expensive rooms in a home.

The Living Room

Another type of home improvement project is improving a living room by adding modern features while taking away clutter.

The first step here is to gather all of the items that need to be sorted through, including toys that haven’t been used in a while or old pillows.

For decorations, homeowners should start with their favorite pieces and make sure they are placed on shelves or tables where they can easily be seen.

Boxes of useless trinkets can now be put away somewhere else, preferably outside the living room all together.

The next step would involve removing any furniture that is no longer necessary or attractive. While these could possibly go into another room for storage, it’s usually best to dispose of them altogether—like broken chairs that might have sentimental value but aren’t sturdy enough to keep around forever.

Once this is done, it will be much easier to find places for the new items.

If the homeowner is interested in purchasing a new piece of furniture, like an entertainment center or a coffee table, this would be the best time to do it.

It’s also possible to make changes by painting the walls and installing new flooring if necessary.

The Exterior

Outdoor home improvement projects can be just as difficult and expensive as any others within the home.

For example, landscaping involves taking care of plants and trees—and many homeowners will need to hire professionals for this part of their project due to its extensive nature.

A good landscaper should plan out every step in order to keep costs low while improving property value at the same time.

For instance, they could start cutting back overgrown bushes with electric pruners before moving on to removing dead plants.

The next step would involve modifying existing features, like building a deck or constructing a children’s playground area.

Finally, they can fill in holes where plants are currently growing and make sure everything looks nice again, indicating the end of their project with mulch for new plants.

Homeowners may also want to look into making changes to the exteriors of their home which can include changing up roof types or improving insulation performance by having new windows put in place.

This is not only beneficial but essential since lower energy bills will pay for themselves quickly even though major renovations are costly at first—and the more work involved with these projects is done now, the more benefits will be reaped later on.

The Bedroom

A bedroom is a place where a homeowner can rest easily, so it’s important that the room be as comfortable as possible.

One way to do this is by having new furniture or storage solutions implemented into an existing design.

For example, many homeowners have removed dressers altogether since clothes are oftentimes kept in other rooms such as the closet and laundry room these days.

Instead of spending money on replacing cabinets or closets, people can make their bedroom feel more open and airy by removing any heaping piles of clothes from the floor and bed.

Drawers should be cleaned out to make space for items like alarm clocks and anything else that might be needed regularly throughout the day.

Too much clutter will likely prevent relaxation, so take the time to clear it all away—and don’t forget about the large pile of clothes in the corner that could be taken to a local donation center.

The Backyard

While the front of a homeowner’s property is usually where they spend most of their time and effort, don’t forget about the backyard.

Raised patio decks and grilling stations are very popular among homeowners with enough space for it in their yards or gardens—and these features can easily be built over time using wood chips and thick planks.

Installing fences to keep wild animals out is also advisable if there aren’t already any in place.

Raised deck platforms come with pre-defined steps that need to be installed before work on the actual flooring begins—and many customers will have a difficult time completing this part themselves since holes must be drilled into concrete surfaces without cracking them.

It may take some planning but it is possible to design something that suits the surroundings, like building a pergola over the grilling area for extra shade when it’s hot outside.

The Basement

Homeowners with basements should take this time to make their basement a more livable place by adding in necessities like a bathroom, bedroom or storage area.

In the case of the latter, homeowners can actually create their own interior walls from scratch using 2x4s and plywood since concrete block partitions are not ideal for storing items that need some breathing space.

This will allow them to better organize clutter—and it will also increase what they’re able to store down there since the main floor won’t be filled up with junk anymore.

Wrapping it Up

The great thing about home improvement is its versatility, giving homeowners the chance to work with what they have or even design something totally new.

For the latter option, it’s possible to start from scratch with a complete renovation of rooms that are in desperate need of fixing.

It’s also possible to simply update some parts of homes that are looking tired after years of wear and tear, or bring things up-to-date by adding modern appliances while redoing kitchen cabinets.

No matter what kind of project a homeowner might be thinking about, there are plenty of options available when it comes to house renovations—and many good reasons why homeowners should consider making changes sooner rather than later.…

Continue Reading
Home Improvement

This One Thing is the Most Popular Home Improvement Project: 11 Tips to Get You Started

The single most popular home improvement project is painting.

The second-most popular? Painting again.

It’s safe to say, we all love a fresh coat of paint!

It’s not hard to see why—a new color scheme can completely transform your space and mood.

But it doesn’t have to be an all-or-nothing affair: you can refresh just one room or corner by giving it a quick makeover with paint.

Here are 11 tips to get you started:

1. Decide on a color scheme.

You’ve got many options when it comes to selecting a color palette, but a little bit of pre-planning can help ensure you make the right choice. Keep these basic steps in mind:

Consider what other colors are already present in your room and how they might interact with the new paint color. For instance, if you know you want blue walls, try out some different blues to see which one will look best on your walls.

Don’t be afraid to mix and match! You can add accent colors by painting pieces of furniture or artwork the same shade as your walls; accessories like throw pillows or lamps work great. The goal is to choose complementary colors that flow smoothly together from one wall to another.

If you’re unsure of what colors to choose, don’t worry! A little trial and error will take you a long way toward the perfect look. And if things still aren’t working out after all that planning? At least now you know how to paint over it!

2. Wash walls before painting.

Remove debris from the wall or surface you plan to paint before applying a single coat (like dust, cobwebs, and other gunk). If you can, wash the walls down with a mild soap and water solution.

Be sure to start at the top of your wall and work your way down; doing so helps remove particles that have settled over time instead of pushing them down where they’ll remain stuck on the wall for longer.

Washing walls before painting can save you time and money.

When you prepare for your project by removing debris, it ensures a smoother finish with fewer headaches!

Give it a try next time you’re ready to paint and see how much of an improvement this one small step makes in the overall look of your space.

3. Roll paint onto drywall in the grain direction, not against it for best results.

The idea behind this is that you are better able to get an even coat of paint on your wall when you apply it in one direction rather than go back and forth over a section repeatedly.

The first pass coats one side; the second pass coats the other side. This way, if there are any ridges or bumps from seams in your sheets of drywall, they will be more likely to show up on your finished surface because you’ll have hit them twice with fresh paint.

And as long as you’re rolling with gravity’s help (not against), those ridges won’t make much difference because they’re going to be covered by the next layer of paint.

4. Use a roller to apply paint onto ceilings and other surfaces with lots of curves or angles

There are many different ways to paint a ceiling, but one of the most popular is using a roller.

You can use rollers on ceilings with lots of angles or curves. They’re also easy to use and less messy than brushes when painting walls or other flat surfaces. Rollers come in several sizes (1 inch, 2 inches, 4 inches), shapes (flat, angled), and materials (foam, natural hair). If you have any questions about which roller might work best for your project, ask an expert at Home Depot!

A few tips:

==> Rollers should be dipped into the paint before application so that they don’t leave streaks.

==> Rollers should be cleaned after each use to prevent them from becoming clogged

==> The roller frame should also be cleaned after each use to avoid build-up.

5. Paint window frames and doorways last, so they don’t get covered up by furniture or fixtures while you’re working on other areas of your home.

Paint window frames and doorways last so they don’t get covered up by furniture or fixtures while you’re working on other areas of your home.

Dealing with trim is one of the most frustrating tasks for a do-it-yourselfer because there’s always some detail that needs to be addressed: caulking around windows, painting door trim, making sure all the edges are neat and tidy.

The good news is that it doesn’t have to be such a chore anymore!

Here are three quick tips for getting it done right:

==> Paint window frames and doorways last so they don’t get covered up by furniture or fixtures while you’re working on other areas of your home.

==> Don’t paint over caulk that you will need to remove later. Instead, wait until everything is all painted, then go back and clean up the old caulk once it’s dried.

==> Buy a couple of gallons of semigloss paint instead of one gallon to save money on each coat. The sheen isn’t as crucial for trim as it is on walls, which helps prevent the extra cost of buying expensive satin or semi-gloss paint.

You’ll still be able to see pretty well what you’re doing when painting if you use a flat finish, but there are still cheap options available such as exterior oil paints or upmarket interior latex paints.

6. Wait at least 24 hours before moving furniture back into the room

Painting your walls is a great way to freshen up your room, but don’t get too excited and rush straight back into space with all of your furniture.

It’s essential to let the paint dry for at least 24 hours before moving any furniture back in. Otherwise, you’ll risk ruining anything that comes in contact with wet paint, like rugs and wooden floors—not to mention creating a huge mess!

The surface will still have some tackiness for days after painting (especially on smooth surfaces), so try not to move things around until you know it has thoroughly dried out.

Here are some more tips to help you save your furniture and other surfaces from paint-related disasters:

==> Remove all pieces of furniture from the room immediately.

==> Before you start painting, lay a drop cloth over any areas where paint might bleed through onto things like rugs or wooden floors.

==> Cover any furniture you are unable to move, like a piano, with sheets to protect them from paint splatters.

==> If the paint does get onto the floor or wood surfaces, wipe it up with a rag and then immediately wash it off.

7. Paint fumes are toxic: Keep children and pets out.

Paint is a dangerous substance. It can be highly hazardous to your health, especially if you have asthma or allergies.

When painting indoors, make sure to keep all windows open for ventilation and any doors leading outside. Seal up rooms or hallways if possible to create a dead-end that will help to contain the fumes.

Don’t make the mistake of using any fans in an attempt to pull the fumes out of your living space. All this will do is blow those same strong paint fumes into different areas of your home while also spreading dust and particles.

It is recommended that children and animals be kept outside the room for 24 hours after a thorough cleanup has been completed to ensure all fumes have dissipated.

8. If you’re painting in a high-traffic area, select an oil-based paint instead of water-based.

The primary difference between oil-based and water-based paints is that oil-based paints dry slowly, meaning they require fewer touch-ups.

This can be a good thing to consider in high-traffic areas because it will take longer for the paint to wear down.

Another difference between the two paints is that oil-based paints are much more resistant to stains.

For some paint jobs, oil-based paint is worth the extra cost and trouble because of its ability to withstand wear and tear.

It should be noted. However, that oil-based paints are incredibly flammable and have a strong odor.

In addition to being more resistant to stains, oil-based paints are also much more expensive than water-based paints.

If you’re unsure what kind of paint to use on a particular job, talk to a hardware store employee or visit an online paint forum.

9. Tape off baseboards, floor molding, and window treatments to avoid covering them with paint splatters.

As you are painting, anything that is taped will be cleaner.

If you don’t like tape, you will experience a messier job. Now you have to go back over spots multiple times, causing streaks or blobs of paint where there shouldn’t be any. This causes an unsightly appearance that no one likes. You had probably seen painting jobs when baseboards and windowsills were not taped and what …

Continue Reading
Home Improvement

Summer Tips for Keeping Your Pool in Tip-Top Shape

Tips for cleaning your swimming pool vary depending on the type of pool you have. The more complex your pool system, the more steps you will have to take to keep it clean and healthy.

  • If you have an above ground pool, you should clean it most often during the summer months. This is because you will have less cover, so you will have to use less chemicals to keep the water crystal clear. However, you should still do a weekly or bi-weekly clean up to remove any leaves and debris that may fall into the water.
  • You should also check the lining of the pool once a week to check for signs of algae. If you detect any algae, then this is the perfect time to clean the pool. You can use any type of natural or commercial algae cleaner for this purpose. You should also wipe the lining of the pool with a regular garden hose when it’s drained to remove any traces of debris.
  • If your swimming pool gets muddy during a particular day, you should make sure that you mop the area thoroughly before getting back into the water. This is to avoid the accumulation of leaves and other small objects which may otherwise cause discomfort.
  • For in ground swimming pools, you will need a different set of swimming pool tips to keep everything in the pool as clean as possible. You also have to consider the structure of the pool. Most people choose to install a concrete pool, because they are considered the safest to have around children. However, you can also install vinyl, which is easier to clean and is also more affordable than concrete.
  • You will also have to consider your pool maintenance schedule. For above ground pools, you will have to clean them more often. This is because algae can form at anytime, especially in hot weather conditions. Because of this, you should clean the pool before it gets too bad. You should also check the pH balance of the water, to make sure you are providing your swimming area with the proper water chemistry.
  • Finally, another thing to remember is to always give your filter a good vacuum whenever you are cleaning the pool. Even if you have a very good filtration system, the filters are not able to trap every single particle that comes through your faucet or shower head. These particles are able to get into your pump, your filter, your tubing and can even get into the actual pump which will eventually clog up the pump. This will result in less efficiency and will cost you money in the long run. Therefore, while the filtration device may be working efficiently and effectively, do not skip out on giving it a good vacuuming and brushing regularly.

Conclusion

These are some tips for cleaning your swimming pool. However, there are many more procedures that can be taken care of if you have a large pool. For example, you may want to invest in an ionic water purification system to clean your pool. This will ensure that you do not develop any health conditions from the water, and it can also improve the taste of the water.

Keeping your swimming pool clean is something that you should do at least once a week. In fact, cleaning it daily during the summer is even better!…

Continue Reading
Home Improvement

How to Spent Mother’s Day at Home: Tips For The Perfect Celebration

Spending Mother’s Day at Home this Year is Smart and Beautiful

In these days of quarantining, vaccines, and masks mandates; it’s no wonder people are wanting to know more about how to celebrate Mother’s Day in the home. 

Here are some examples of ideas of how to celebrate motherhood in your own home on Mother’s Day.

  • One of the best ways in which you can celebrate motherhood in your own home is to plan a brunch party. Brunch parties are one of the best ways that you can enjoy eating good food and enjoying the company of others. If you want to plan a great brunch party, all that you need to do is to start planning early, by making sure that you book some time to prepare the entire meal, as well as setting a date for your brunch party so that you know exactly how much preparation you need.
  • Another idea on how to celebrate mother’s day at home involves baking a special meal for her. This can range from putting together an elaborate meal consisting of mom’s favorite recipes to something as simple as cooking her favorite recipe. It doesn’t even have to be a big meal, you could just bake a pie or chocolate-chip cookies.
  • For outdoor activities,  you can set up a relay race, and other old-fashioned games. These type of activities will generate lots of fun memories and provide them with a sense of competition and fun.
  • Order take-out and have a picnic. This gives you a chance to spend some quality time together instead of spending time cooking.

How to Decorate Your Home for Mother’s Day

Decorating is a great way to bring your home together for Mother’s Day. Whether you decorate with a theme or simply purchase a few different items, you can make the room come together beautifully.

Look for ideas for decorating your home for Mother’s Day in ads and magazines-you will be surprised how many great ideas you can uncover by scouring the advertisements. Keep in mind that ads do not necessarily represent the quality of products or services being offered. Advertisements merely serve to stimulate your imagination and get you started on a thought process about various options. 

Choosing Mother Day’s Gifts

If you are looking for ideas for decorating your home for Mother’s Day, you are in luck because you have so many options to choose from. If mom prefers simple and elegant items, you may want to consider buying her handbags and jewelry in plain styles or a neutral color. This would be a perfect gift idea for Mother’s Day if she likes simple things but does not necessarily like fancy jewelry pieces.

A lot of women enjoy making their own Mother’s Day gifts. If you are crafty enough, you could try making homemade gifts for mom such as homemade bracelets or homemade cards that have special memories or meanings inside them. If you are not artistic enough to make your own gifts, there are so many options online that you can purchase personalized gifts for mom in just minutes. Just go to any online store and start shopping right away. There are so many unique and practical items that you can purchase online.

Conclusion

Mother’s Day is a special day for mothers. It is a day set apart from other occasions in the calendar and is celebrated with great fanfare. So as you can see, you have many options when it comes to how to celebrate Mother’s day. Whatever you end up doing, make sure to tell her that you love her, and that you’re glad she is still with you. There is no better way to say “Thanks” to mom then sending her some kind words as she enjoys what she does most of each day in her life.…

Continue Reading
Home Improvement

The Miracle of New Cookware

There are different types of cookware and each type has its own set of advantages and disadvantages. You can upgrade your cookware for many reasons; one reason is if you want it to last longer. Cookware that does not last long can start to smell, which can really affect how well you cook. 

Choosing Stainless Steel

Another reason you might want to upgrade your cookware is if you are looking for a cheaper alternative. Many cookware is made of stainless steel, which is cheaper than copper or aluminum cookware. Copper, silver and copper are also durable materials, but they tend to be more expensive than stainless steel. Stainless steel is a very durable material, and it can last a long time without rusting. Many cookware companies have been making cookware in stainless steel for years, so it should not be hard to find quality products.

Choosing Aluminum

If money is a huge issue, you might want to look into cookware that is made of a very light metal, like aluminum.  Aluminum cookware is great for those who want a very lightweight option, but the downside is that the pans do not last as long as stainless steel.

Choosing Copper

The last thing you will want to consider when choosing which cookware to buy is your personal preference. If you feel that copper is your favorite color, then you will likely want to choose copper kitchenware. Most chefs and cooks feel that copper is one of the most beautiful materials for cookware.

One of the downsides to copper is that it is very heavy, so if you are going to be carrying the cookware around you may want to invest in a lighter-weight pan. Other disadvantages of copper include the fact that it rusts easily and that it conducts heat poorly. For these reasons, copper may not be the best choice for those who tend to be more aggressive in their cooking.

How Easy is it to Clean

When choosing what material to buy, you should also consider how easy the item is to clean. You will want to keep the cookware that you buy in top condition, so you will want to make sure that the cookware replacement is easy to clean.

Conclusion

When you are considering all of the advantages and disadvantages of each type of cookware, you will want to take into account the extra cost associated with replacing your current cookware. Many people feel that purchasing new cookware is an unnecessary expense. However, when you consider the extra costs that you will be incurring because of constantly replacing the cookware and having to purchase new items for your kitchen, you might find that this is an investment worth making. You should keep in mind that this purchase will also help to protect your family from dangerous substances that can be present in older cookware.…

Continue Reading
Home Improvement

Why You Need to Pave Your Driveway

Paving your driveway is one way to improve your home’s value. If you’re wondering if it is worth the investment, there are a many benefits to consider before you decide on this home improvement project.

Paved Driveway Pros

Added Home Value: One of the pros of paving your driveway is the added value to your home. It makes your home more attractive to potential buyers. It can increase the marketable price of your home. A properly paved driveway can be one of the selling points when you decide to put your home on the market.

Less Cracks: Another pro of a paved driveway is that they are less likely to crack. Most cracks occur because you overuse a specific part of the concrete.

Easy to Maintain: Paved driveways are easy to maintain, which means that they will save you a ton of work and money in the long run. 

Conclusion

If you are like many, you might have considered the advantages of paving your driveway. You will most likely agree that having a paved driveway is significantly more attractive than one that is simply paved in concrete. For one thing, the color of the driveway can be customized easily. You can use various colors to create patterns or simply use the color black to create a completely uniformed look.

Paving your driveway might also be a great way to create additional space for walkways. However, if you are like many people, you might be concerned that it is much too expensive to hire a contractor to do this for you.

Fortunately, you do not need to pay an arm and a leg to have your driveway paved. All that you need to do is to find a good set of do it yourself driveway pavers. Once you have found a company that offers quality driveway pavers at an affordable price, you will be well on your way to learning how you should pave your driveway.

By using do it yourself driveway design kits, you will be able to create the perfect driveway for your home. All that you need to do is to choose a design from among the many that are available.

Then, follow the instructions included with the kit to create a driveway design that will meet all of the specifications necessary for your particular driveway.

When you pave your driveway yourself, you will enjoy the peace of mind that comes with knowing that you did the work yourself. That alone gives you valuable peace of mind.


 …

Continue Reading
Home Improvement

Why You Wake Up With a Stuffy Nose

Does the air in your home need to be cleaned?

A stuffy nose in the morning is a common problem and there are many reasons behind its cause.

One of the most common ones is the spread of nasal congestion from one nostril to the other, due to breathing through the mouth. This makes the air passing through the lungs more obstructed and causes stuffy nose in the morning.

In order to combat the problem, you need a good quality air purifier that will filter the air before it reaches your nose. This is why you need to know what to look for in home air filters.

The Best Home Air Filters

There are many brands of air filters that you can choose from, but most people think that purchasing a cheap air purifier is the best solution. But in reality cheap air filters simply do not work as well as the ones that are of better quality.

The better air filters have things like HEPA filtration and advanced technologies to help reduce the amount of dust and other microscopic particles in the air that you breathe. This helps prevent asthma attacks and stuffy noses in the morning.

A good air purifier also removes the bacteria, viruses and other airborne contaminants that cause nose infections and other health problems.

What to Look For When Buying

When buying an air purifier for your home you should keep in mind the brand name and the model number. It is best that you buy a good quality air filters from reputed brands like the HEPA air purifiers and Oreck air filters.

The trick to buying the right air purifier is reading reviews about the brand and then doing some research about the different models on the internet.

Research is important because different people have different reactions to air purifiers, for example, some may have a lot of negative feedback while others may have positive comments.

Also, make sure that you go for air purifiers that have a warranty so that you can avail of repair and replacement services easily if needed.

How Air Filters Work

You may be wondering how air filters work and why you need an air purifier to clear out the air in your home.

Air filters work by trapping particles like dust and other harmful allergens in the air and then trapping them inside the filter where they are kept safe from your lungs.

Filters collect particles from the air. The particles are then deposited on a resin bed that is located inside the air filter. Once the particles are deposited, the air filter starts to filter out the unwanted particles.

The way the system works is that the impure air flows through the coil on the top of the air filter where the dirt particles are caught by the coil. Then, the dirty particles are removed from the system and removed from your indoor air quality.

So, how do you make sure that the air you breathe is free of pollutants? That answer is an air purifier. An air purifier will catch the impure particles, and it will remove them from your air. But, you cannot operate an air purifier without an electronic charge.

Final Words

Why you have a stuffy nose in the morning is nothing more than having blocked nasal passages, so the best solution for this problem is to have your air filter fixed by a professional.

There are many online stores that sell air purifiers, but you must make sure that it is a reputable store. When you are buying the air purifier, you must make sure that it is made of high quality material because it is your health that you are trying to protect and preserve. Most of the time, these air purifiers come with a long warranty so you can have peace of mind that you bought the right air purifier for your needs.…

Continue Reading